誰でも自分専用のChatGPTを作成できるGPTsの使い方 (4) - Actionsを使用して天気予報を取得する

本シリーズでは、目的に特化したChatGPTを作成できる、OpenAIのGPTsについて紹介します。
今回は、Actionsを使用して天気予報に関する回答を行うGPTを作成します。
1. 気象庁の天気予報JSONデータをOpenAPIフォーマットに変換
-
今回は、気象庁で提供されている以下のJSONデータを使用します。
- 1週間の天気予報
https://www.jma.go.jp/bosai/forecast/data/forecast/130000.json - 今日の天気予報の概要
https://www.jma.go.jp/bosai/forecast/data/overview_forecast/130000.json - 「1週間の天気予報の概要」を取得できる以下JSONデータも以前は提供されていたようですが、
更新が停止されているため今回は使用しません。 https://www.jma.go.jp/bosai/forecast/data/overview_week/130000.json
- 1週間の天気予報
-
130000の箇所にはエリアコードが入ります。エリアコードは以下より確認できます。 https://www.jma.go.jp/bosai/common/const/area.json -
上記データ取得方法をGPTsのActionsで使用できるように、OpenAPIのフォーマットで記述します。
-
手動で作成するのは大変なので、ChatGPTの力を借りて作成します。
-
使用したプロンプト
以下のデータを下に、OpenAPIフォーマットで仕様を出力してください。
URLの"130000"の箇所には地域コードが入ります。operationIdを必ず設定してください。
https://www.jma.go.jp/bosai/forecast/data/forecast/130000.json
https://www.jma.go.jp/bosai/forecast/data/overview_forecast/130000.json
-
-
以下のyamlフォーマットのデータが出力されました。
openapi: 3.0.0
info:
  title: JMA Weather Forecast API
  version: 1.0.0
  description: API for accessing weather forecast data from Japan Meteorological Agency (JMA).
servers:
  - url: https://www.jma.go.jp/bosai/forecast/data
paths:
  /forecast/{areaCode}.json:
    get:
      summary: Retrieve detailed weather forecasts.
      operationId: getWeatherForecast
      parameters:
        - name: areaCode
          in: path
          required: true
          description: The area code to retrieve weather data for.
          schema:
            type: string
            example: '130000'
      responses:
        '200':
          description: Successful response with weather forecast data.
          content:
            application/json:
              schema:
                type: object
                properties:
                  publishingOffice:
                    type: string
                  reportDatetime:
                    type: string
                  timeSeries:
                    type: array
                    items:
                      $ref: '#/components/schemas/TimeSeries'
  /overview_forecast/{areaCode}.json:
    get:
      summary: Retrieve weather forecast overview.
      operationId: getForecastOverview
      parameters:
        - name: areaCode
          in: path
          required: true
          description: The area code to retrieve weather overview for.
          schema:
            type: string
            example: '130000'
      responses:
        '200':
          description: Successful response with weather forecast overview.
          content:
            application/json:
              schema:
                type: object
                properties:
                  publishingOffice:
                    type: string
                  reportDatetime:
                    type: string
                  targetArea:
                    type: string
                  headlineText:
                    type: string
                  text:
                    type: string
components:
  schemas:
    TimeSeries:
      type: object
      properties:
        timeDefines:
          type: array
          items:
            type: string
        areas:
          type: array
          items:
            $ref: '#/components/schemas/Area'
    Area:
      type: object
      properties:
        area:
          type: string
        weatherCodes:
          type: array
          items:
            type: string
        winds:
          type: array
          items:
            type: string
        waves:
          type: array
          items:
            type: string
2. GPT Builderを使用して大枠を作成する
次に、初回で紹介したGPT Builderを使用して、天気予報に関する回答を行うGPTの大枠を作成します。
-
以下URLよりGPT Builderを開きます。
https://chat.openai.com/gpts/editor -
GPT Builderと会話を行い、大枠を作成します。

-
用途とプロフィール画像を指定後、「Configure」は以下のように設定されました。

3. 天気予報を取得するアクションを作成する
-
次に、天気予報を取得するためのアクションを設定します。
「Configure」内のActionsにある「Create new action」を選択します。
-
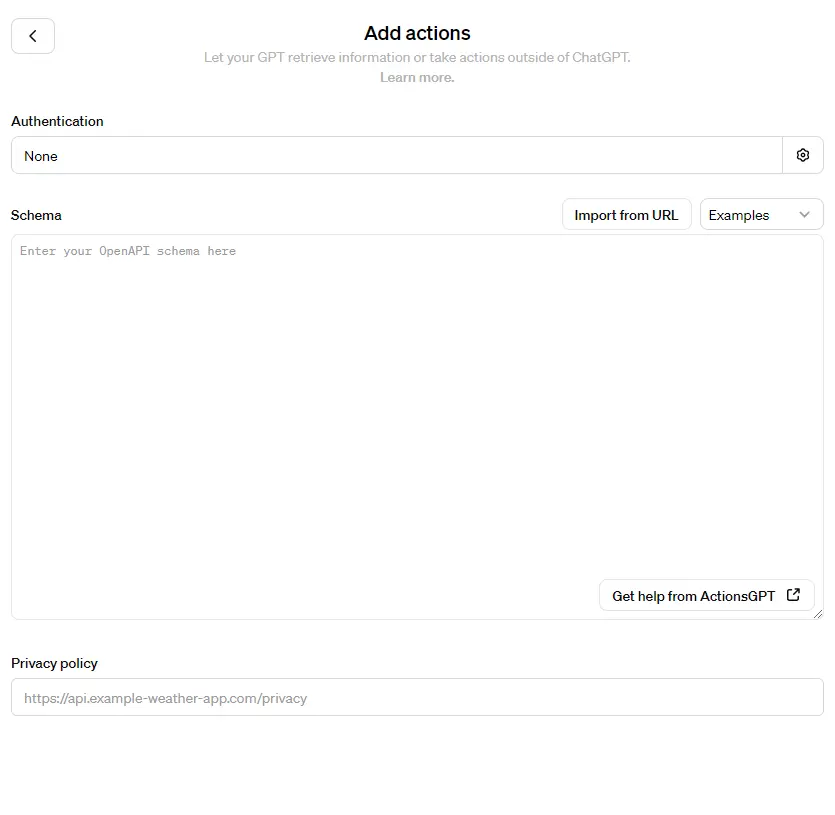
すると、以下の画面が表示されます。
-
各項目は以下のとおりです。
- Authentication: 認証方式を選択します。
- None: 認証なし
- API Key: APIキーを使用
- OAuth: OAuth認証を使用
- Schema: 使用するアクション(Web API)をOpenAPIフォーマットで入力します。
- Privacy policy: GPTsを公開する際のプライバシーポリシーを設定します。
- Authentication: 認証方式を選択します。
-
今回は、以下の通り設定します。
設定完了後、左上の「<」ボタンで前のページに戻ります。- Authentication: 認証不要であるため、
Noneに設定。 - Schema: 最初に作成したyamlデータを入力します。
- Privacy policy: 公開せずに個人で利用するため設定不要です。
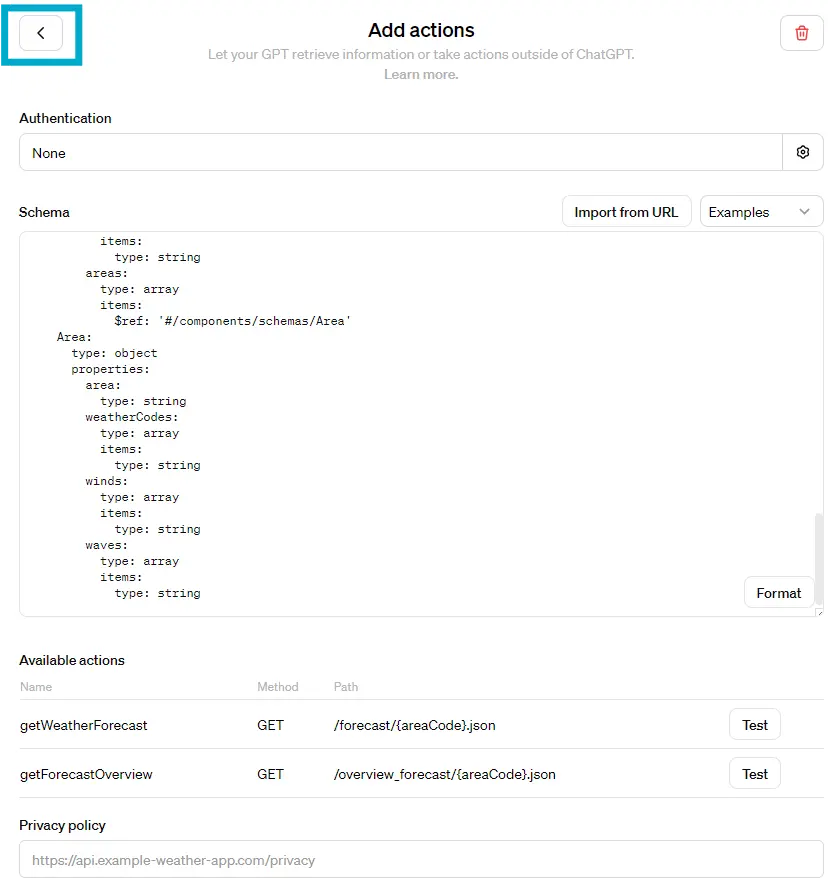
- Authentication: 認証不要であるため、
-
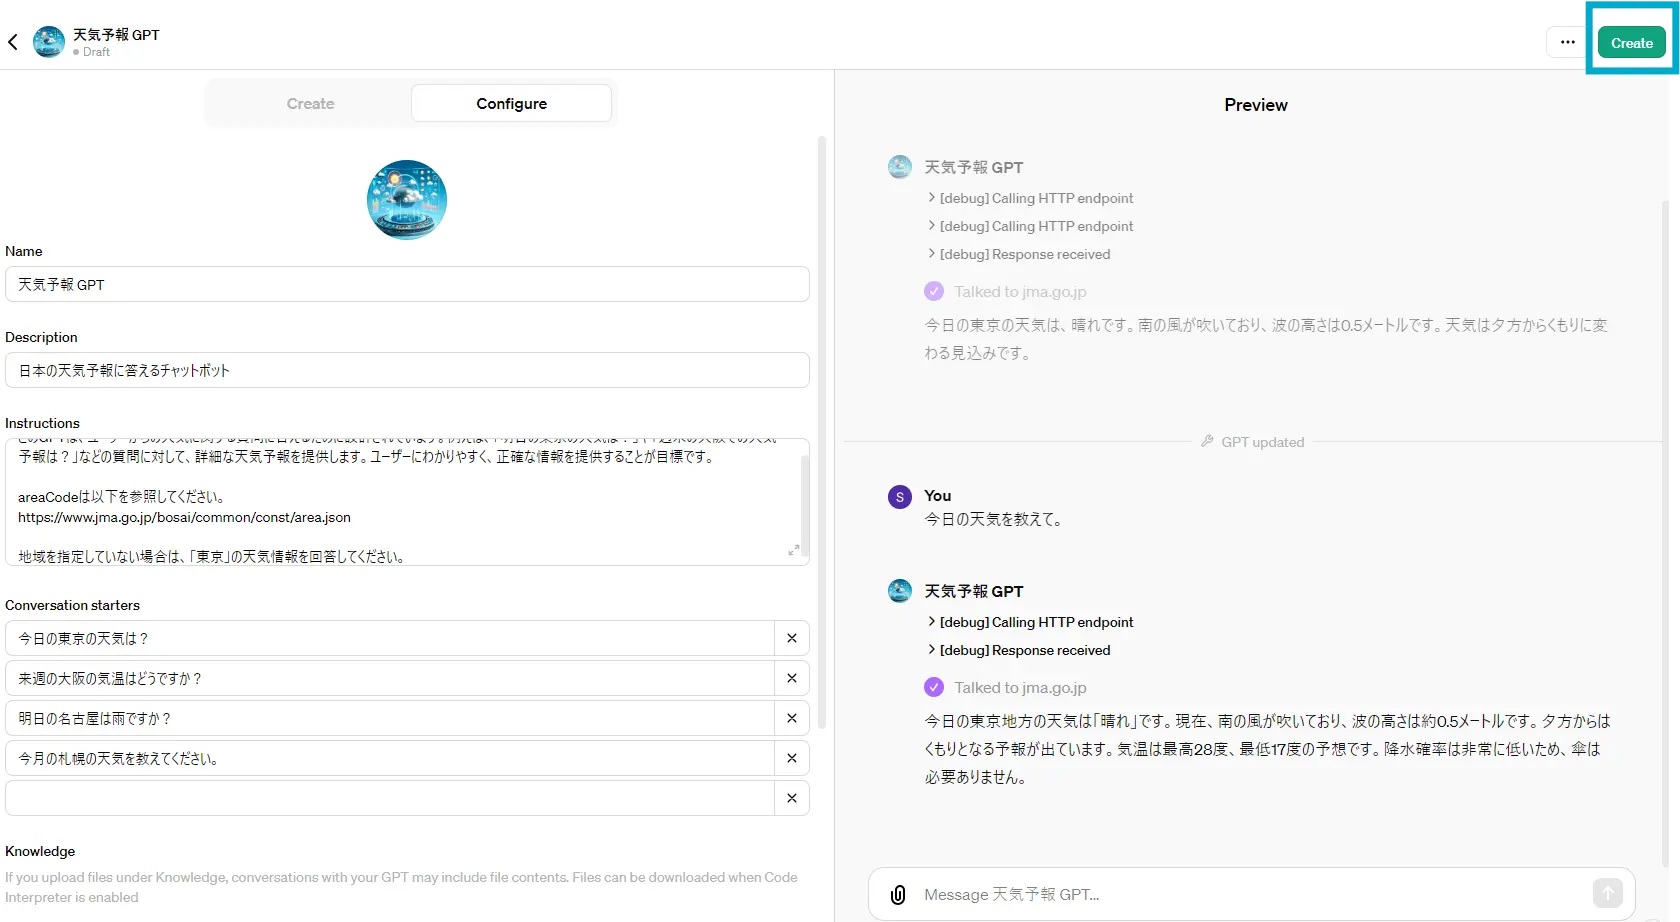
エリアコードを自動で取得するように、「Instructions」に以下の文言を追加しておきます。
areaCodeは以下を参照してください。 https://www.jma.go.jp/bosai/common/const/area.json -
右画面のPreviewで動作確認しましょう。
初回はAPIのアクセス許可を聞かれるので、「Always Allow」を選択しておきます。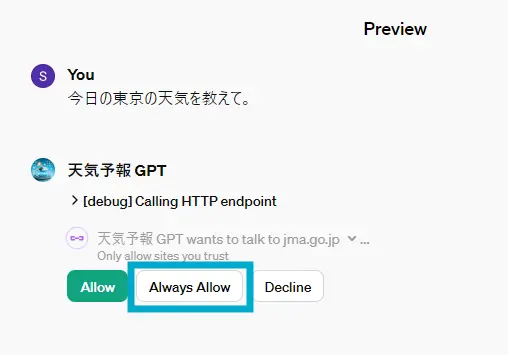
-
以下のようにデバッグ情報が確認できます。
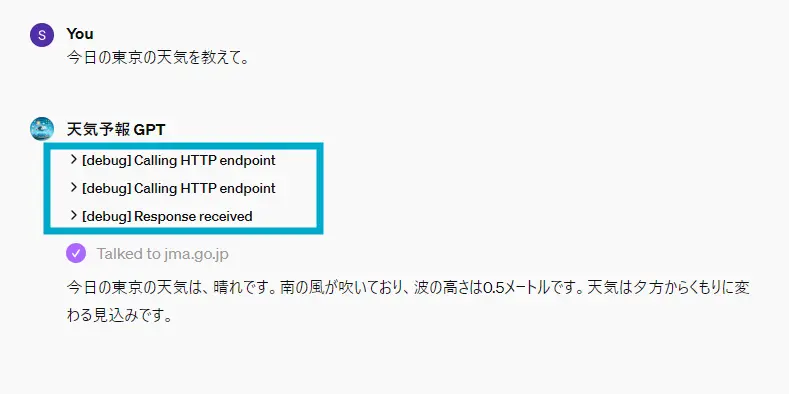
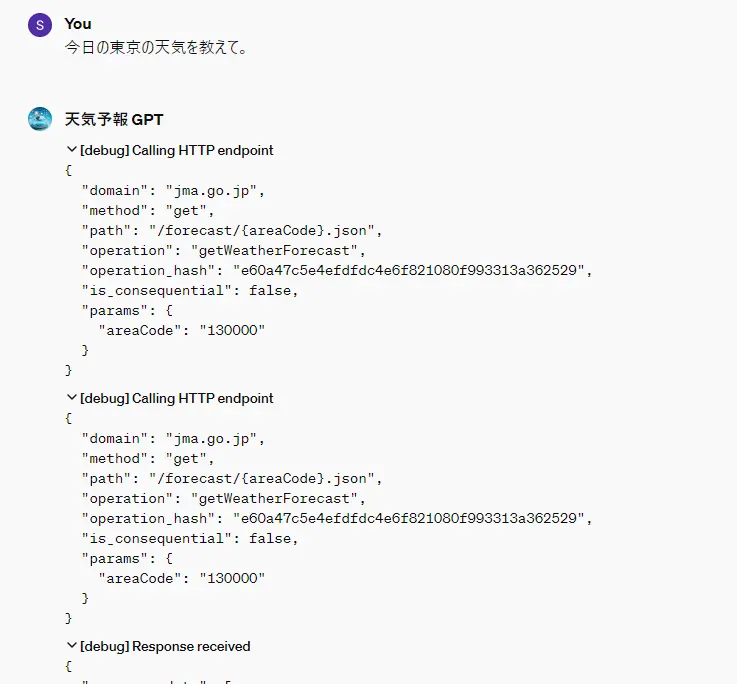
-
地域を毎回指定するのは面倒なので、「Instructions」に以下プロンプトを追加しましょう。
地域を指定していない場合は、「東京」の天気情報を回答してください。
-
動作確認が完了したら、右上の「Create」をクリックしてGPTを作成します。
-
以下のようなざっくりした質問にも答えてくれるチャットボットが作成できました。
-
Q: 洗濯するのはいつが良い?

-
Q: 明日は半袖でも良い?

-
まとめ
今回はGPTsのActionsを使用して、天気予報に関する質問に答えるチャットボットを作成しました。
気象庁の提供しているJSONデータをWeb APIとして扱えるようにOpenAPIフォーマットで記述を行い、
アクションに設定を行いました。
次回は、Actionsを使用してGoogle Calendarから予定を確認・追加できるGPTを作成します。
