Building a Discord Chatbot with Python (3) - Adding Your Bot to Discord
In this article, we’ll walk through the Discord settings for your chatbot.
1. Create a Discord Account
If you don’t already have a Discord account, start by creating one.
For a guide on account creation, check out this link.
2. Create a Discord Server
Next, set up the Discord server where your chatbot will operate.
-
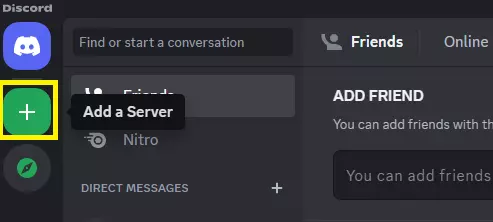
Click the ‘+’ icon in the top-left corner.
-
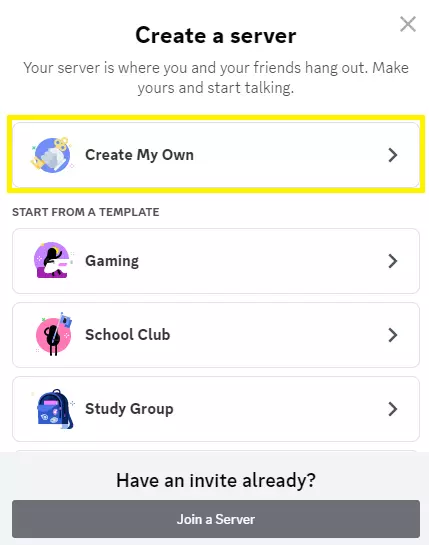
Choose “Create My Own”.
-
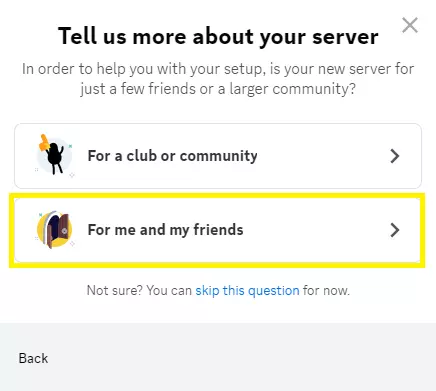
Select “For me and my friends”.
-
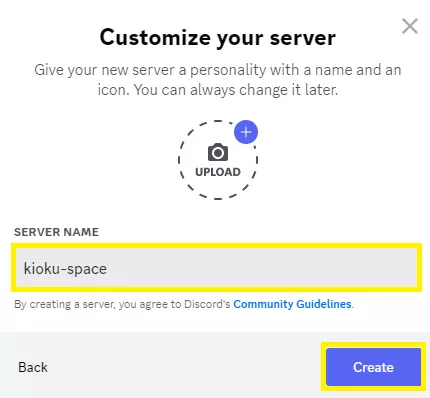
Enter a server name and click “Create.”
-
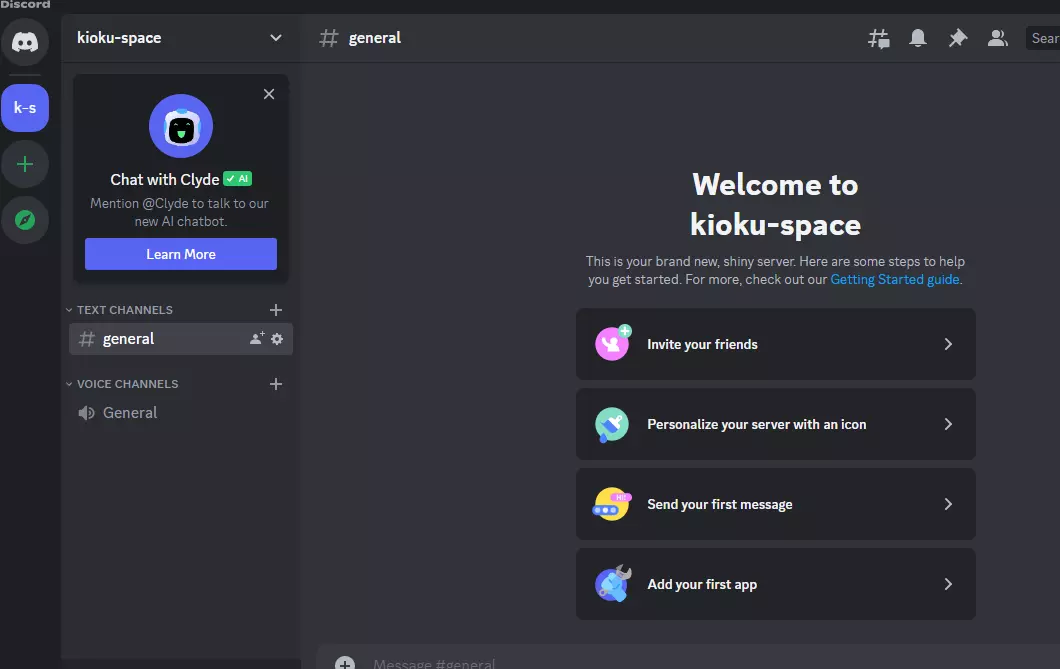
Your server is now set up!
3. Create Your Bot and Get its Token
Now, let’s obtain the token required for our program.
-
Go to the Discord Developer Portal.
-
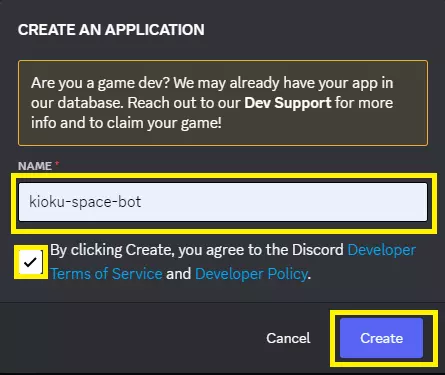
Click “New Application” in the top-right corner.

-
Fill in your bot’s name, check the box, and click “Create.”
-
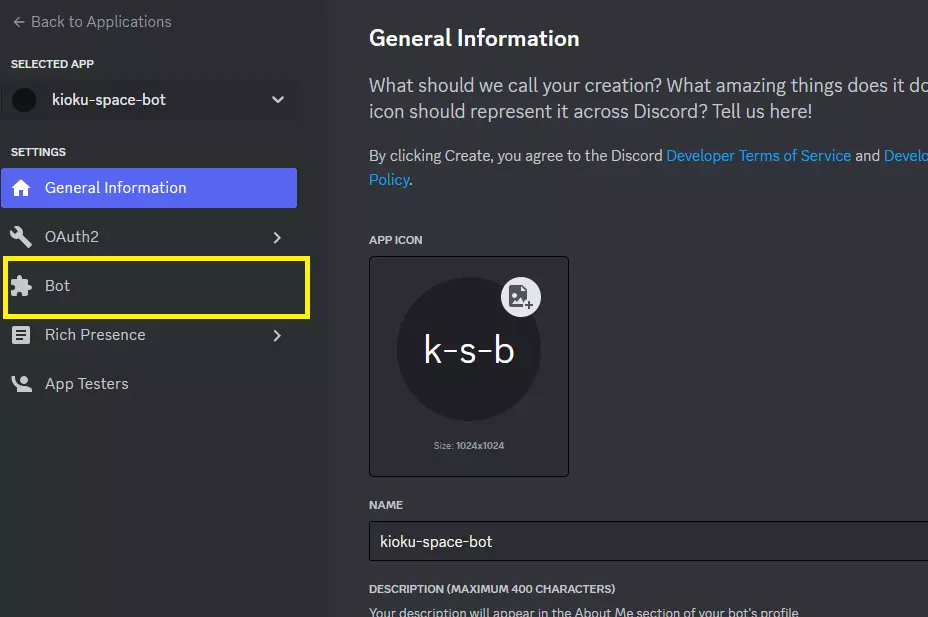
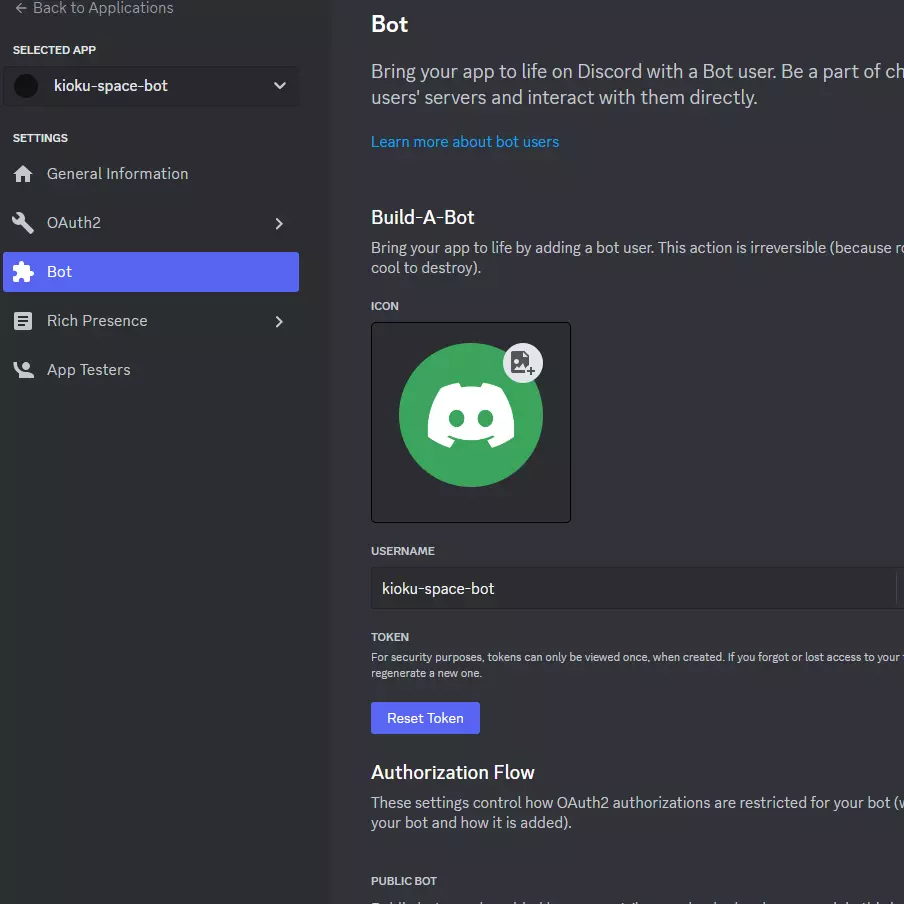
Your bot is now created. Then click on “Bot” from the left menu.
-
You’ll be taken to the bot configuration page.
-
As we’re developing a private bot, turn off the “PUBLIC BOT” option under “Authorization Flow.”

-
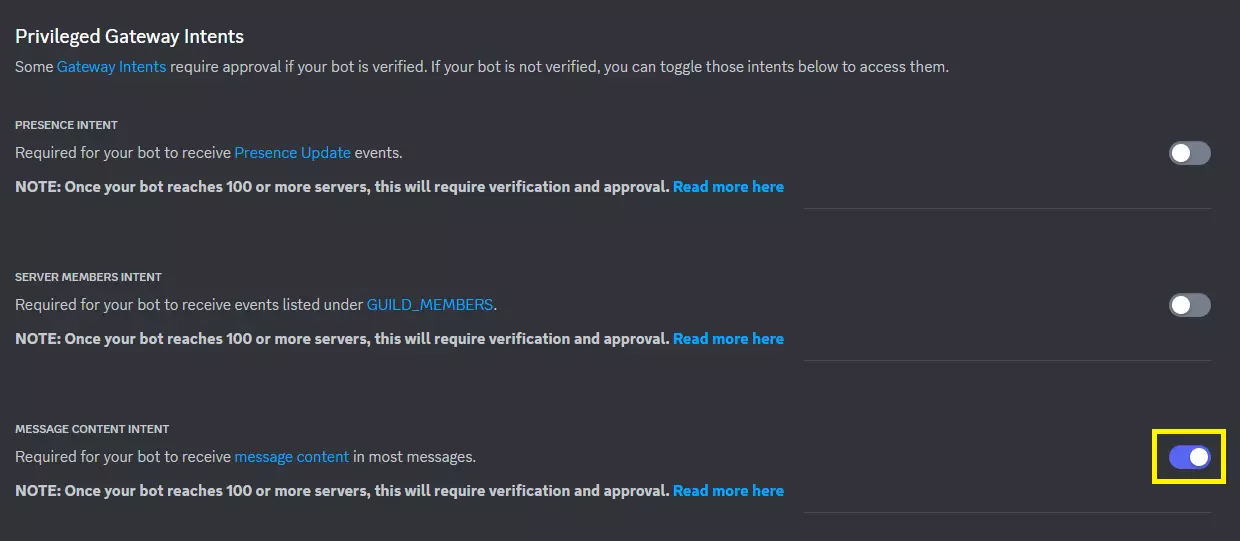
Enable the “MESSAGE CONTENT INTENT” under “Privileged Gateway Intents” to allow the bot to receive messages.
-
Save your changes.

-
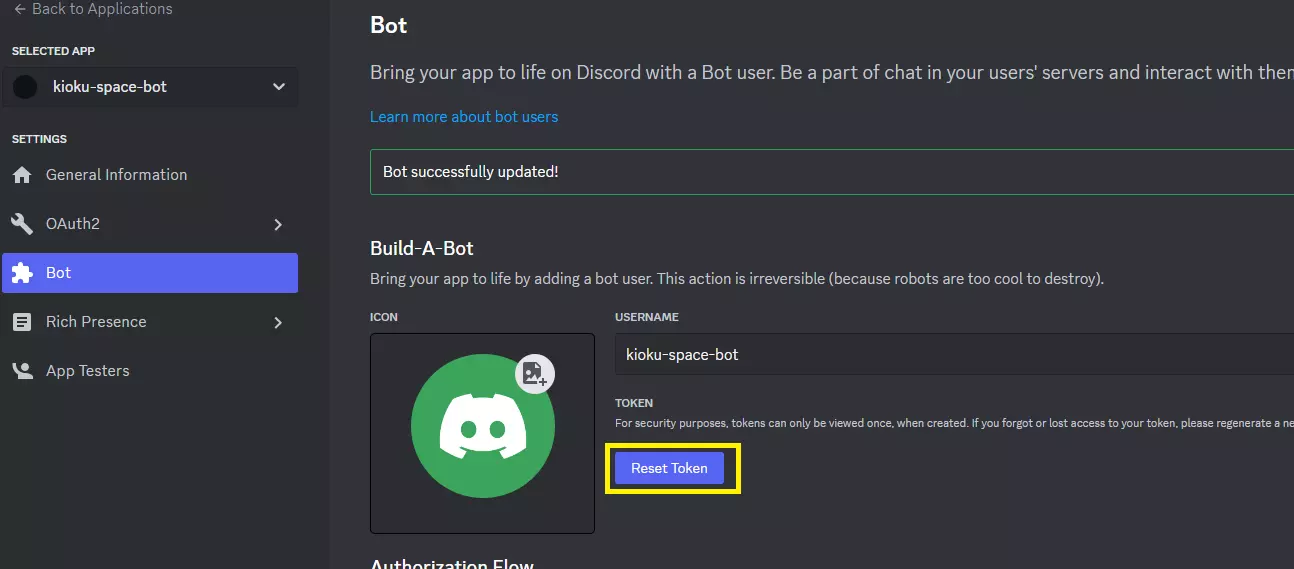
Scroll up and click “Reset Token.”
-
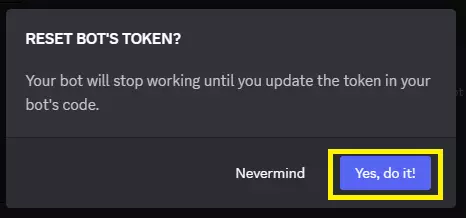
Confirm the reset since it’s not in use yet by clicking “Yes, do it!”
-
Your token will be shown in a highlighted section. Click “Copy” to save it to your clipboard.

-
Store the copied token in a file named
.discord_tokenwithin your working directory.
4. Invite Your Bot to the Server
Lastly, let’s get the bot into your Discord server.
-
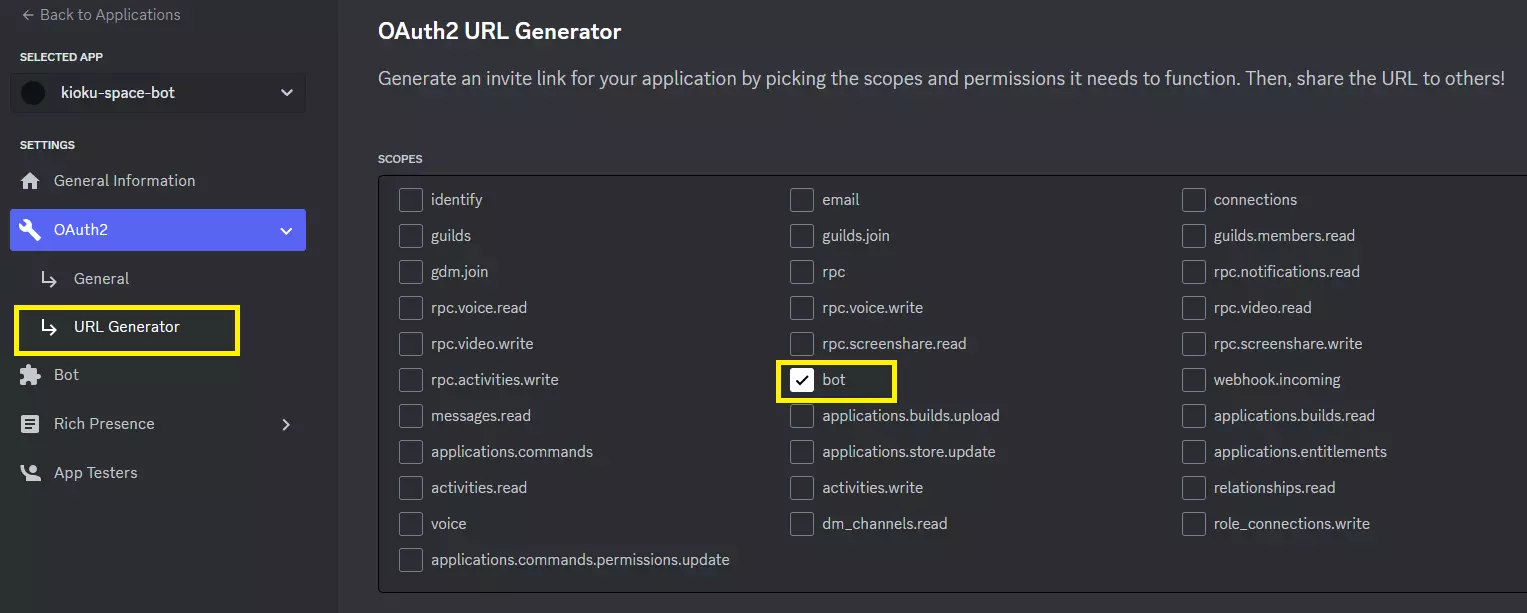
From the left menu, choose “OAuth2” and then select “URL Generator.” Make sure to check the “bot” option under “SCOPES.”
-
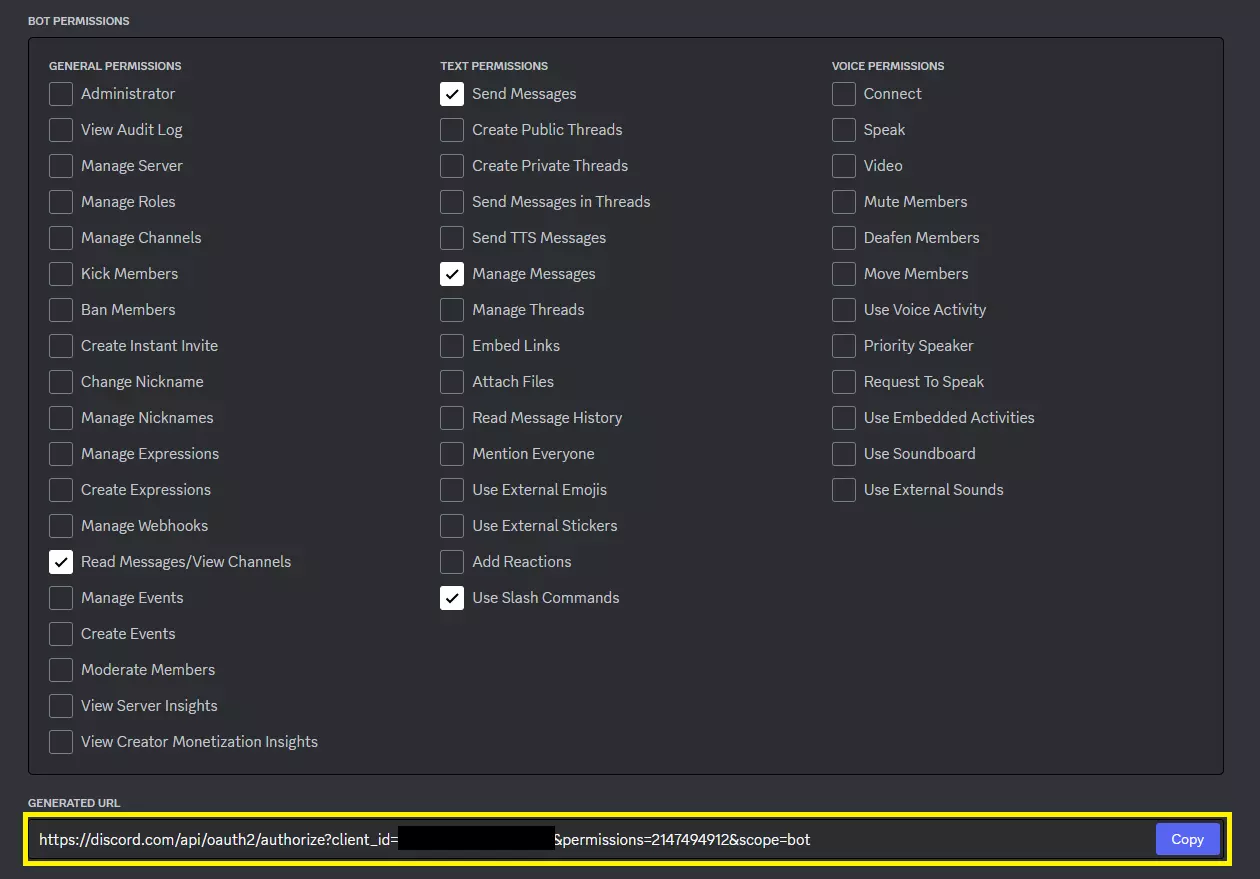
This will reveal the “BOT PERMISSIONS” section. Define the permissions for your bot and then copy the “GENERATED URL.”
-
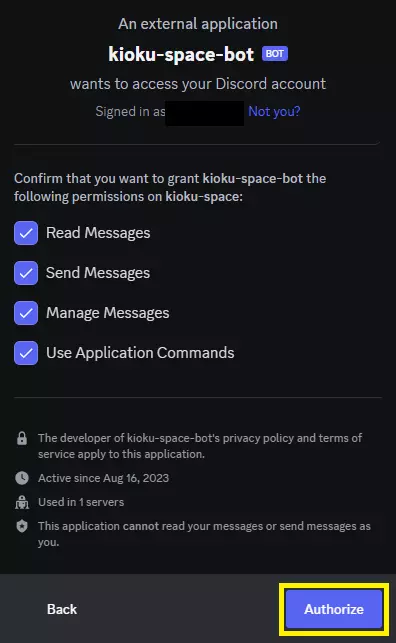
Visit the copied URL and invite the bot to your newly created server.

-
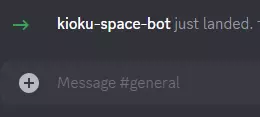
Your bot is now successfully invited!
That wraps up our article for today.
Stay tuned! In our next installment, we’ll bring our chatbot to life.